
First workspace setup
A step-by-step checklist for configuring company context, model access, AI employees, tools, tasks, approvals, and recurring work.
Use this guide to turn a new workspace into a small AI team with one complete, reviewable work loop.
1. Sign in and create the workspace
Open the Yodu app and sign in with your email. Yodu sends a secure sign-in link. During the private beta, invited company domains can continue into the app; other addresses join the waitlist.
Create a workspace for one company or client. Confirm:
- workspace name
- company domain
- timezone
- primary owner
- which human members may administer settings
Do not combine unrelated companies in one workspace. Memory, files, employees, connections, and tool access all use the workspace as their boundary.
2. Add company memory
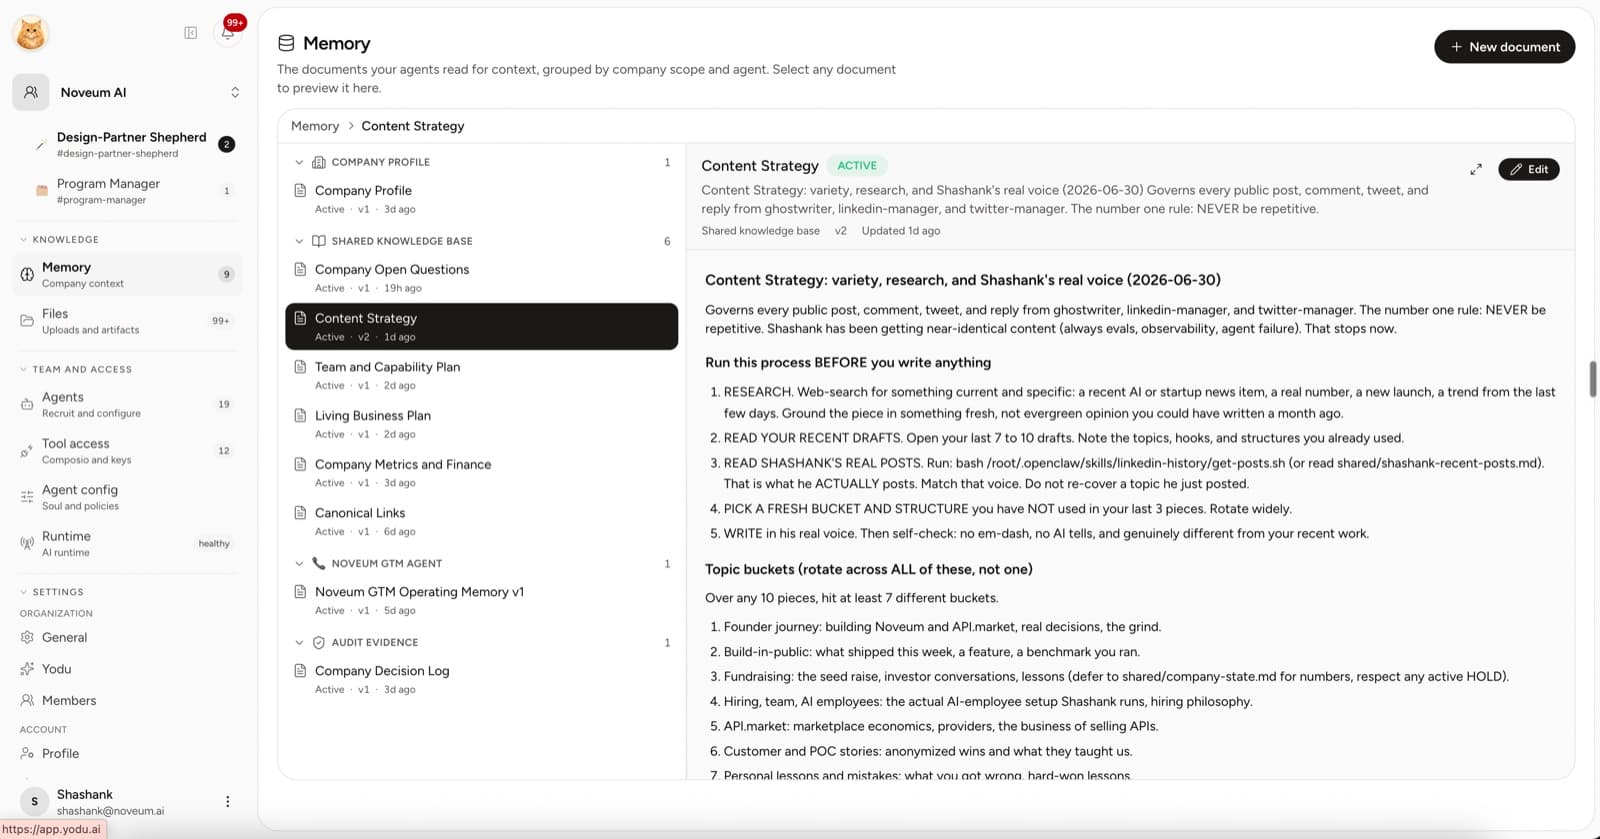
Open Memory and create the company profile. Keep it short enough to maintain and specific enough to guide work.
Include:
- what the company sells
- who buys it and why
- current positioning and proof
- pricing or packaging that employees may reference
- brand and writing guidance
- important policies and non-negotiables
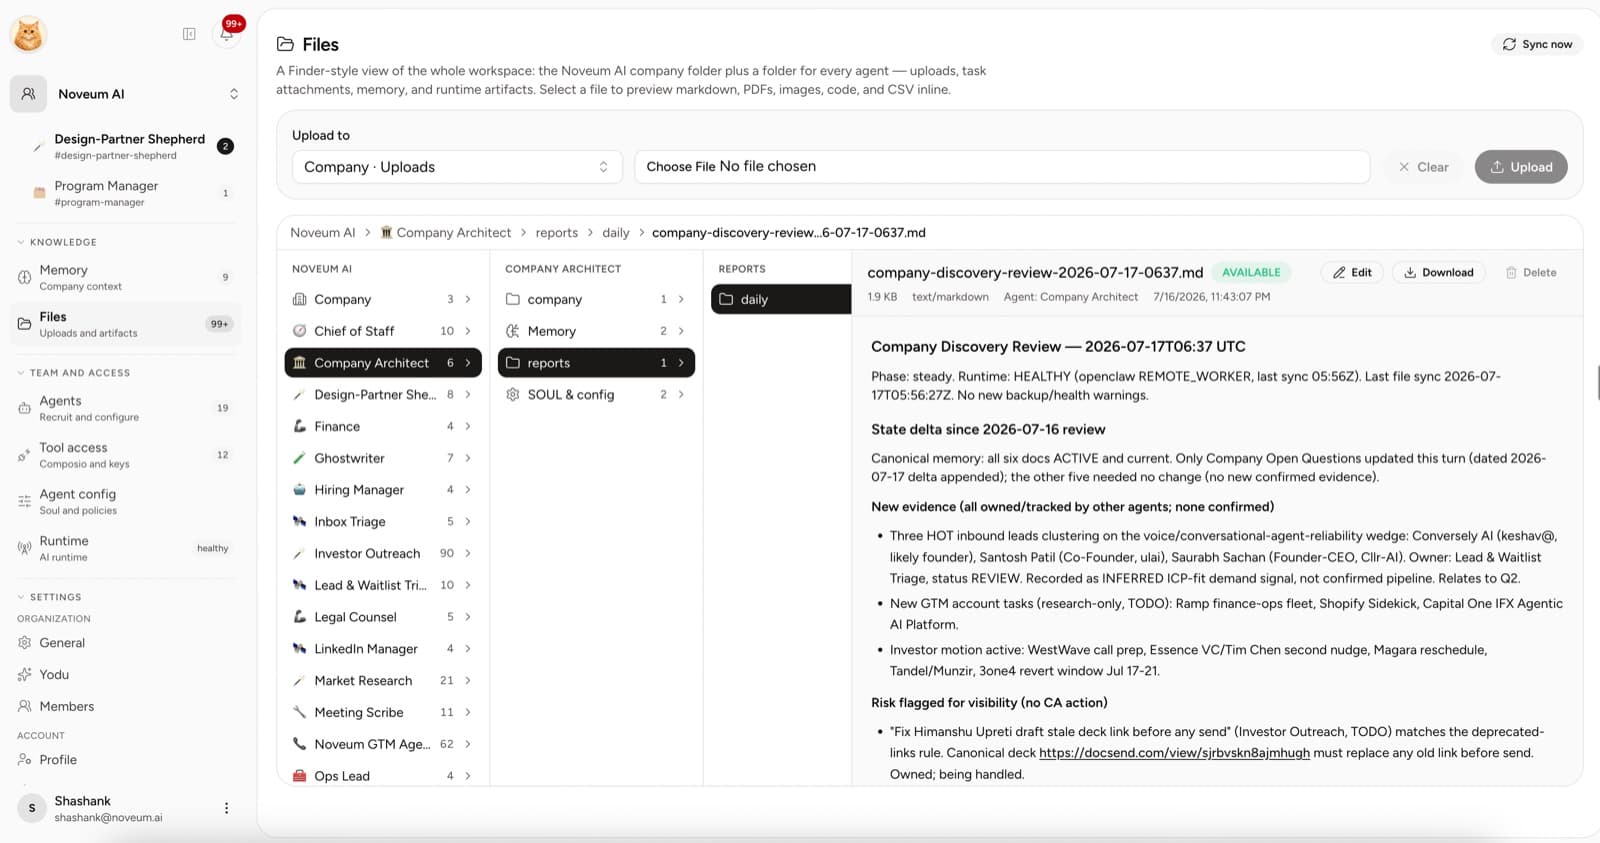
Add separate shared knowledge documents for deeper material such as competitor research, customer interviews, support policy, or campaign notes. Upload source files in Files and link them from tasks when they matter.
3. Configure model access
Open Organization settings → Yodu. Add at least one supported provider:
- OpenAI API access
- Anthropic API access
- supported Claude subscription token
- OpenRouter access
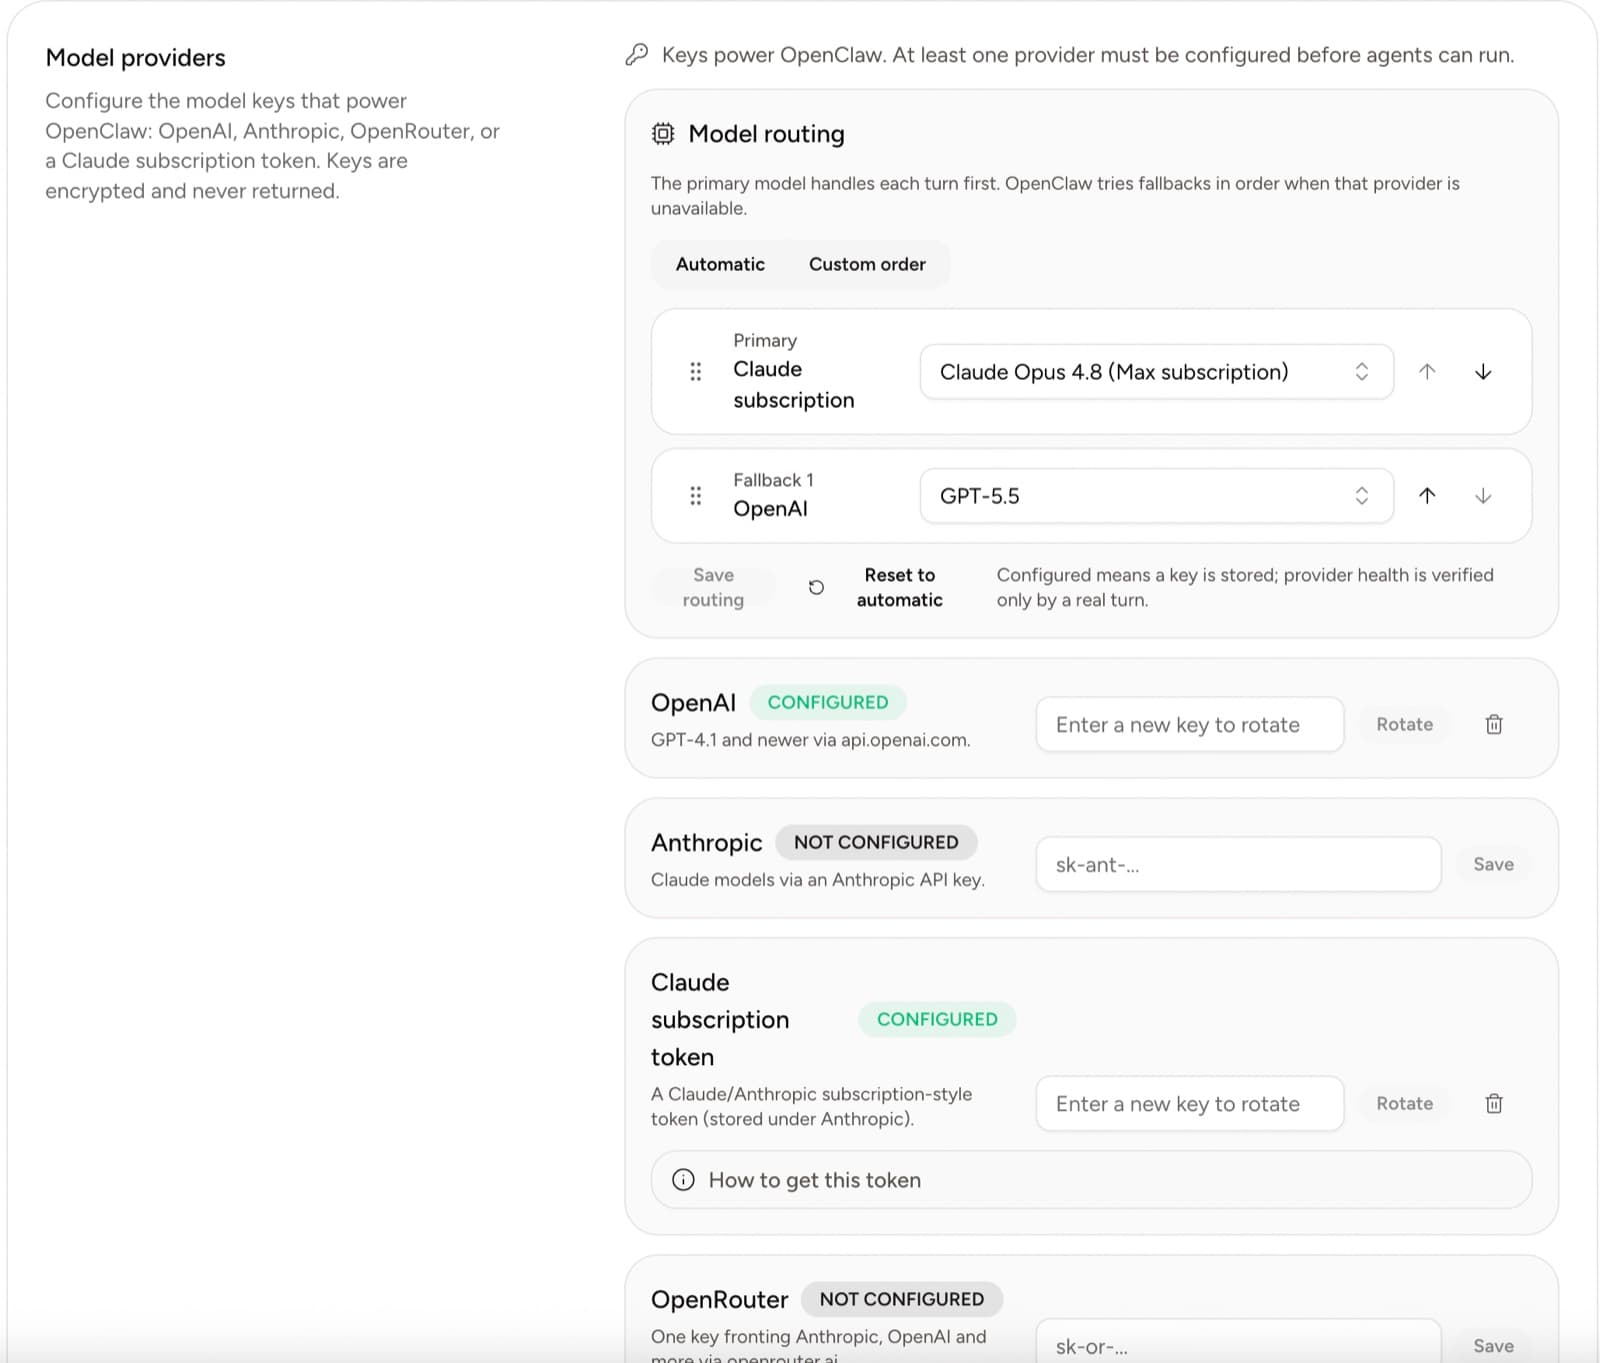
Provider secrets are workspace-scoped. Enter a new value to add or rotate access; saved secrets are not displayed again.
Use Model routing above the provider cards to choose how models fail over:
- Automatic prefers a configured Claude subscription, then OpenAI, Anthropic, and OpenRouter.
- Custom order lets you drag providers, use the keyboard-accessible move buttons, and choose one model for each configured provider.
- The first row is the primary model. OpenClaw tries each numbered fallback when the earlier provider cannot complete the turn.
Saving routing automatically prepares the running workspace again. Allow about a minute for the runtime to reload. Removing a provider also removes it from routing and promotes the first remaining fallback when necessary.
A Configured badge means Yodu has an active stored secret. It does not claim that a completion has recently verified the key, subscription allowance, or provider health; a real employee turn is the authoritative end-to-end check.
4. Hire the first AI employee
Open AI employees and choose a role template. Start with one role whose output is easy to verify.
For the employee, confirm:
- name and title
- mission and responsibilities
- expected outputs
- company and role memory access
- which tools stay enabled for this role
- model selection
- human escalation owner
Keep the first assignment inside the workspace — research, drafts, briefs. External actions stop at the approval gate automatically, so the first review happens there, not in configuration.
5. Connect one app
Open Tool access → App catalog. Search for the app needed by the first assignment and start the connection flow. Yodu shows connected accounts separately from the catalog.
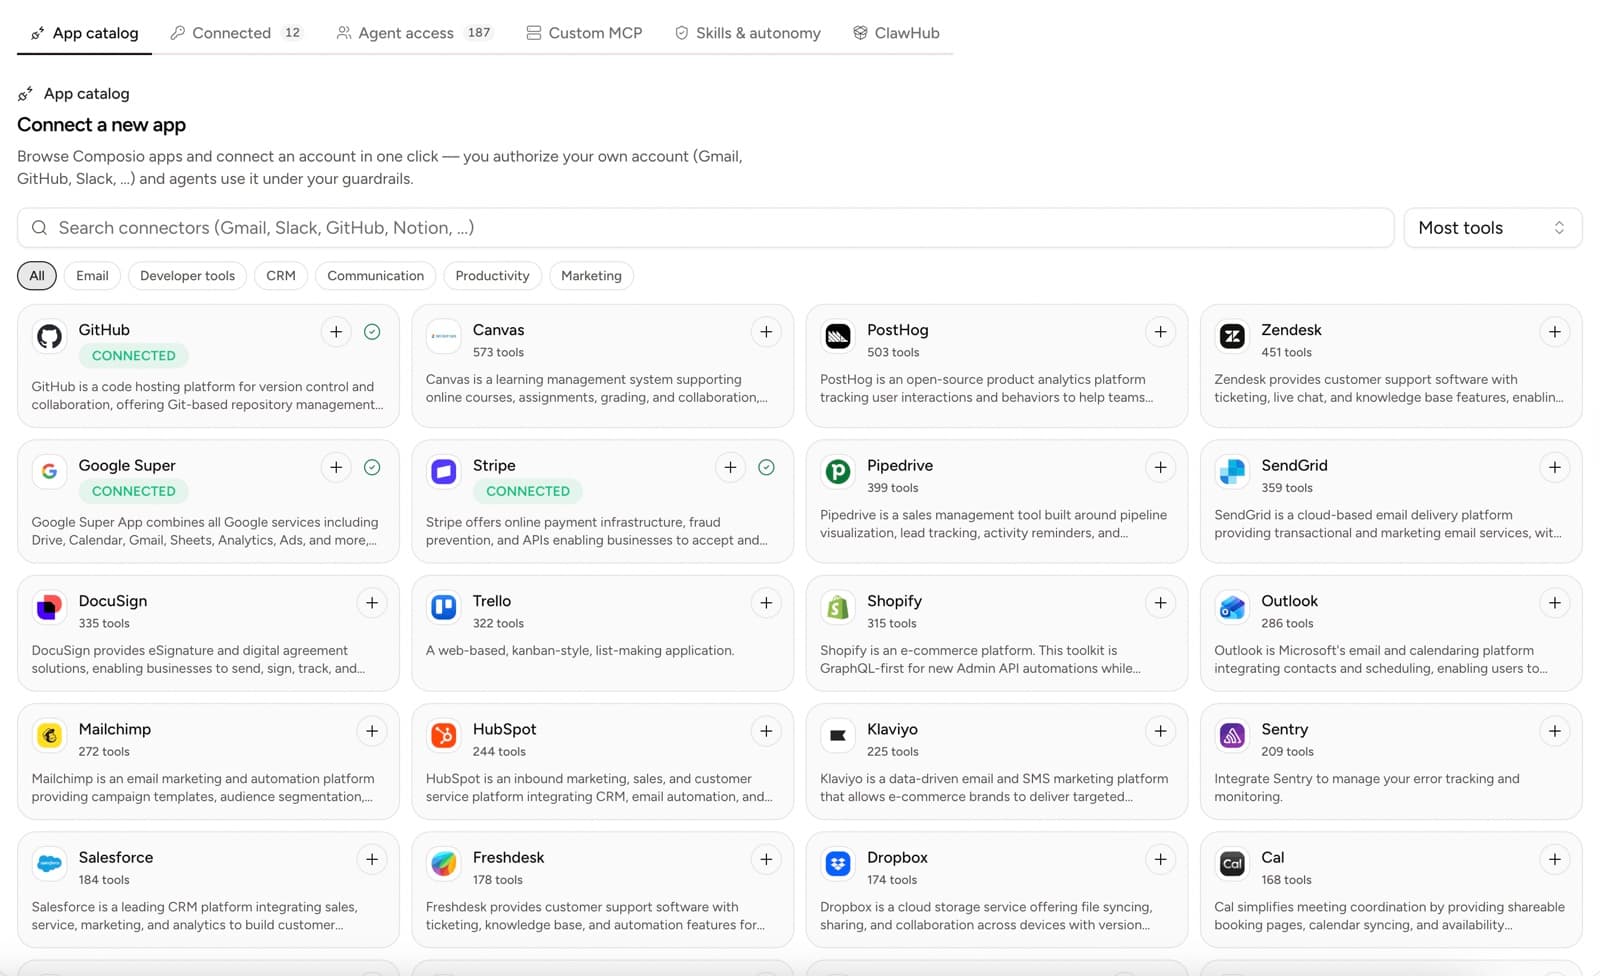
After the account is connected, it is enabled for every employee by default. Open Employee access and disable the switch for employees who do not need it. Two things to remember:
- The switch controls visibility only. Disabled means the tool is hidden from that employee entirely.
- Risk is handled by the approval gate. Anything external or irreversible — send, post, publish, spend, delete — stops for a human decision no matter which switches are on. See Approvals and autonomy.
6. Add the first work
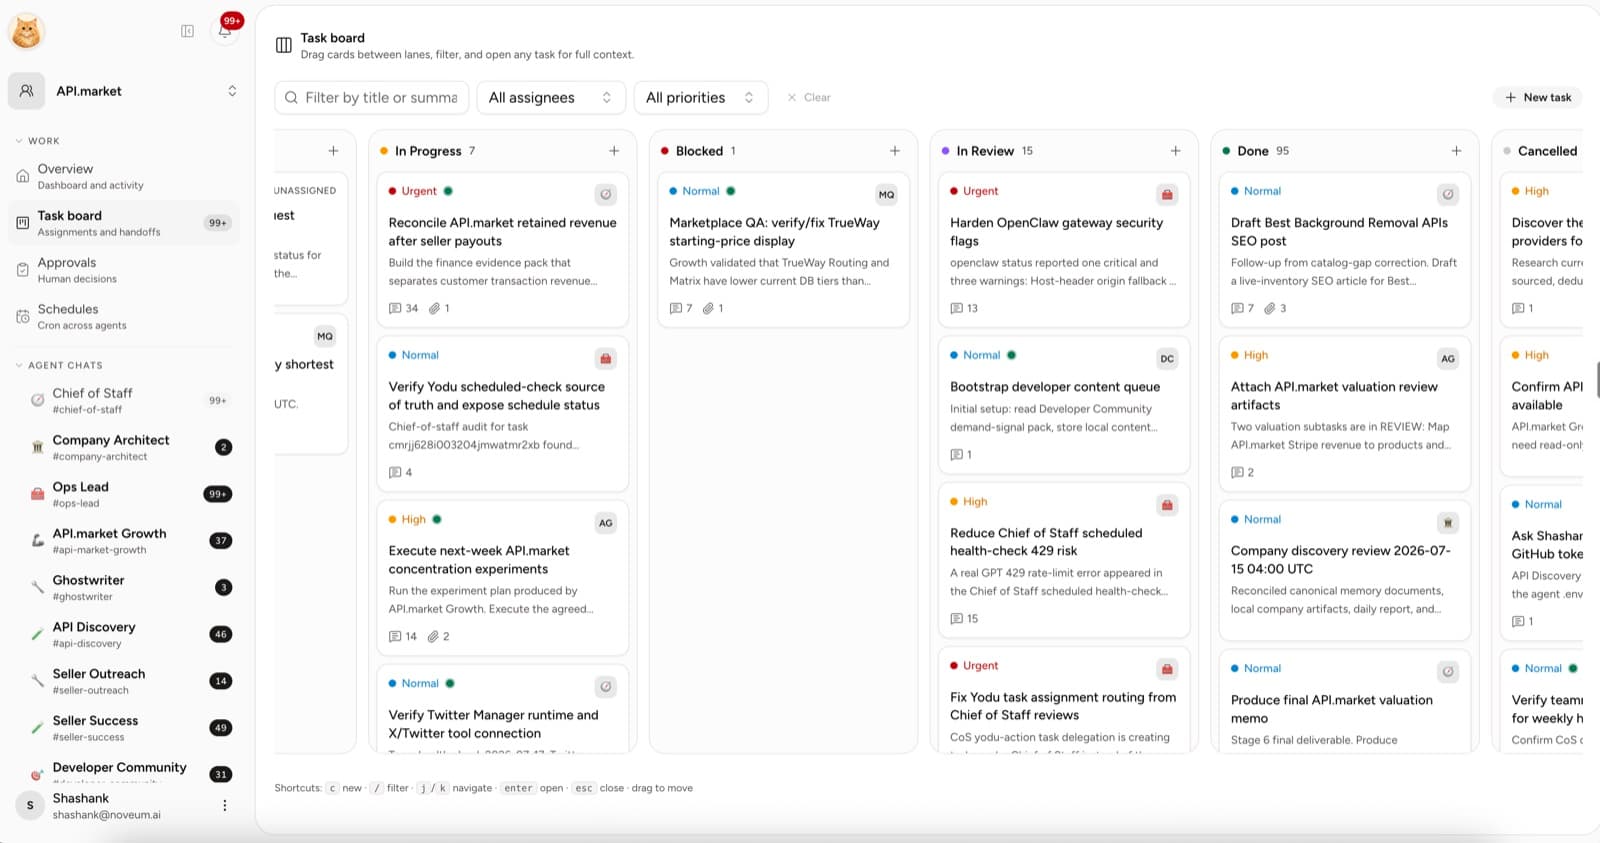
Create three to five cards on the task board. A good task includes:
- a clear outcome
- the assigned employee
- priority and due date
- source links or files
- the required review state
Use the board lifecycle as designed: Triage → Backlog → Todo → In progress → Blocked or In review → Done, with Cancelled for intentionally stopped work.
7. Add recurring work
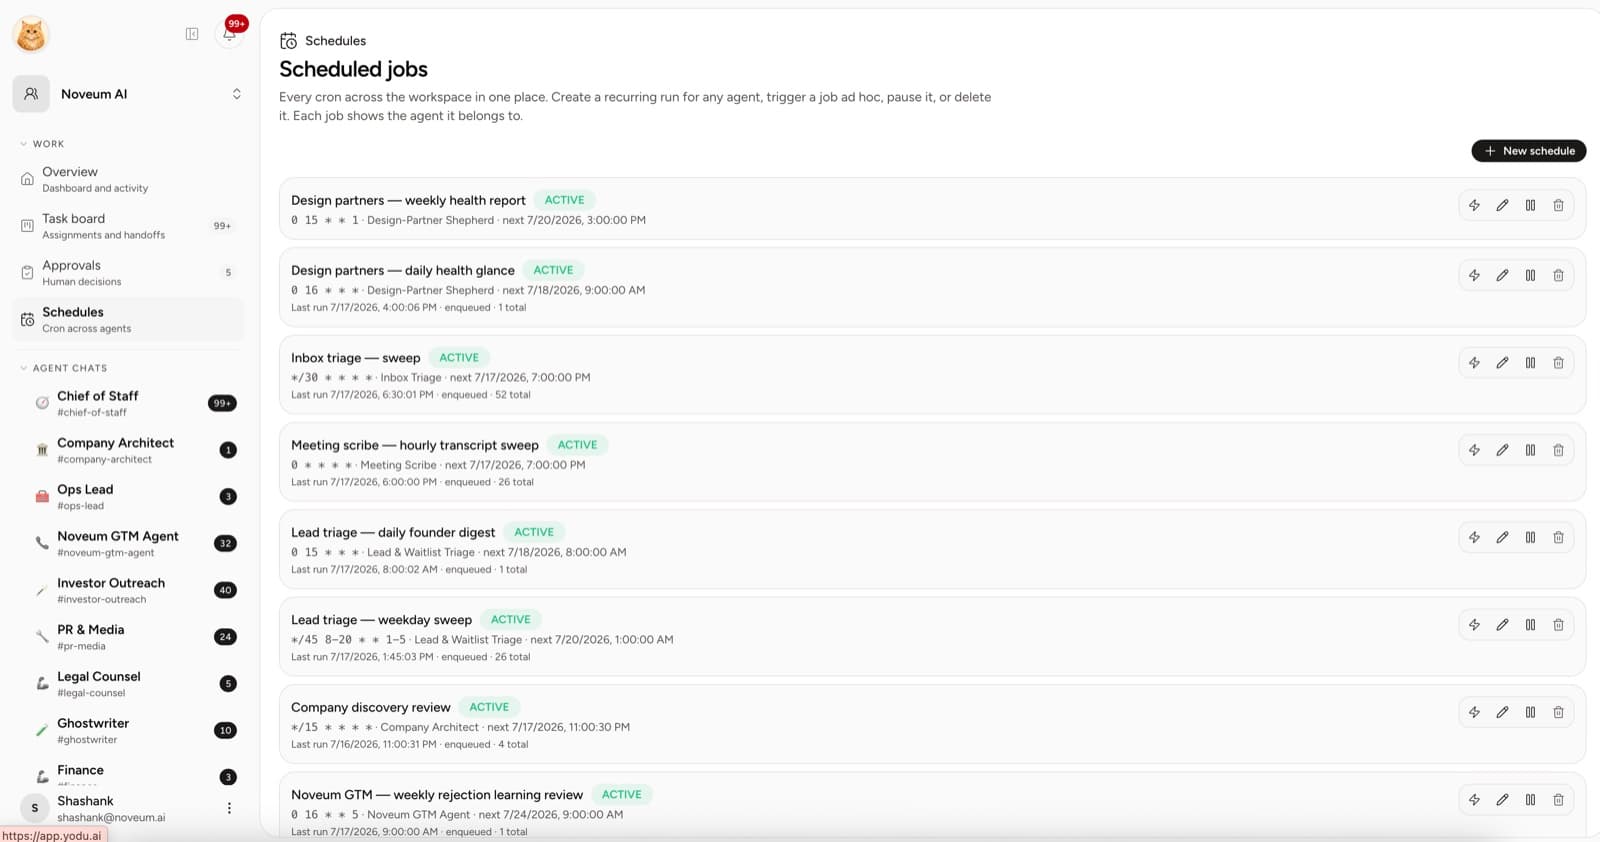
Open Schedules when a job should repeat. Set the owner, cadence, timezone, and task. Use the run button for an on-demand test before trusting the schedule.
8. Verify the first loop
Send the employee a focused message or assign a backlog task. Confirm that you can see:
- the employee channel and response
- the task owner and status
- any generated file or linked evidence
- an approval card when the employee attempts an external action
- the schedule owner and run timing for recurring work
- healthy workspace and employee runtime status
If one of those is unclear, fix the role brief, memory, task, or tool switches before adding more employees.
Ready-to-expand checklist
- Company profile is current
- At least one provider is configured
- One AI employee has a clear job
- The employee has only the tool switches enabled that the job needs
- A real task has moved through the board
- The output and source material are easy to review
- Sensitive actions stopped at the approval gate during testing
- Recurring work has been tested on demand
Once this loop works, add the next employee around the next bottleneck rather than hiring an entire org chart at once.
Getting started
Follow the shortest path from a new Yodu account to a useful first AI employee with company context, model access, tools, tasks, and review.
Workspaces and AI employees
Understand how companies, human members, AI employees, channels, tasks, and permissions fit together so work stays scoped in Yodu.